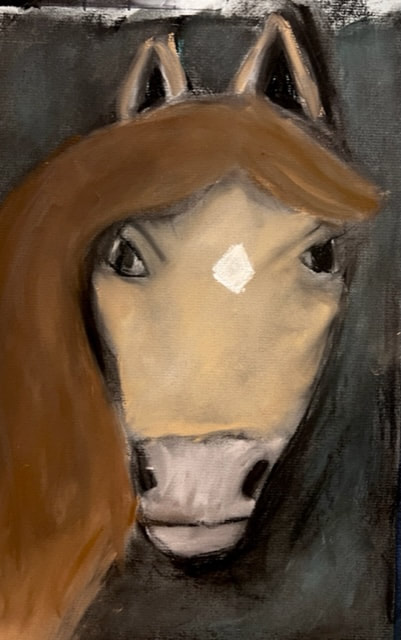
 The Elementary Art Students really impressed me with their Animal Value Drawings this week. This was the most challenging lesson, combining what we had learned this month. 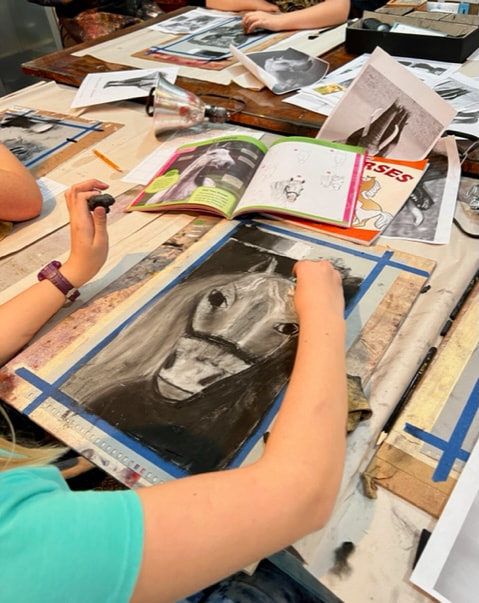 We started by discussing Contour and Value and made a value scale with our charcoal. I then passed out black and white photos of animals and some vine charcoal. Some students brought in their own images. The students started by lightly outlining the animal's basic shapes. We then toned the entire animal medium gray with vine charcoal. After that, we squinted at the photos to see the dark and light areas. Then, we added the dark areas focusing on the shapes of the areas, not the lines. We then discussed where the light came from and erased the lighter areas. Finally, we sparingly added white highlights. 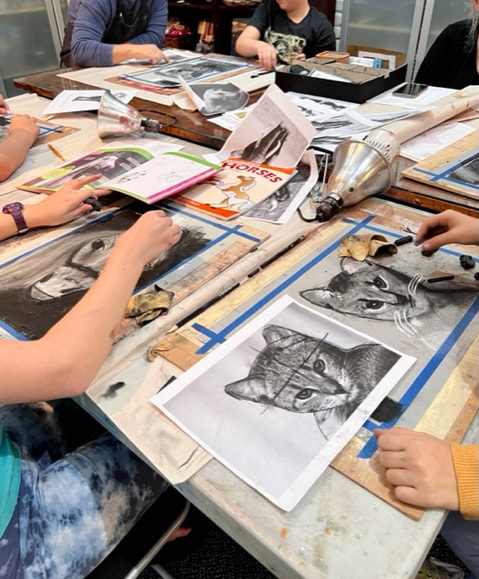 More Detailed: What You'll Need: • 12" x 18" white sulphite/drawing paper • vine, compressed charcoal, Conte white crayons eraser • Pictures of Elephants and Rhinos, Horses Objectives: •Understand Value by creating light and dark areas of contrast •Understand contour line Pick out a photograph that resonates with you; note it is easier to draw the side views rather than the front view, as the Profile has stronger lines. Look at the photograph and map out where the head is located. Then, practice drawing the head shape on the paper with their finger before committing to charcoal. Using vine charcoal, lightly draw the shape of the head using the photograph to guide you. Don't make assumptions about what you see. In other words, don't assume that the elephant's head is a circle. Instead, look carefully and trace the head shape with your finger to get an idea of its shape. Continue drawing the body using the same technique. Draw lightly.
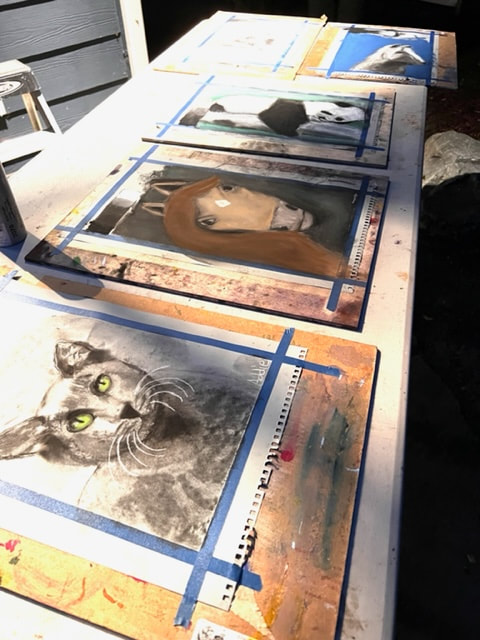
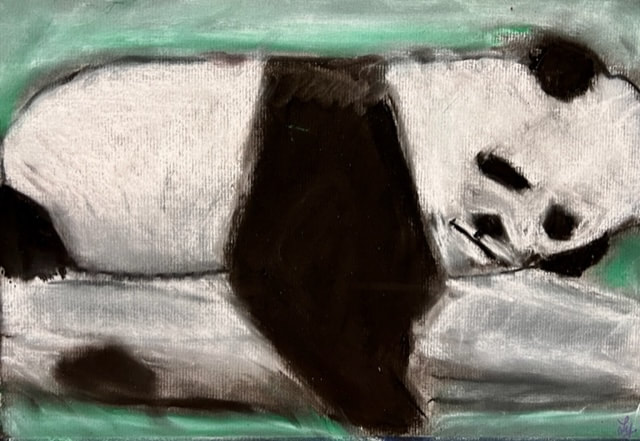
After you feel confident that you have achieved the primary contour line and small inner details of the animal, start adding contrast and details. Start with the head and lightly color in the base coat. You might want to place the charcoal on its side to achieve a flat, smooth color. Next, smudge the color to create a smooth finish. Squint to see the Darker areas and add in where there is a shadow with compressed charcoal. You can go as dark as you want. Look at the picture carefully. Do you see a shadow under the ears? Or trunk? Once you add shadows, the area you previously colored looks lighter; This is called CONTRAST or VALUE, which makes a drawing interesting. Now erase the lights - discuss where the light is coming from and erase the lighter areas. Lastly, add in the details. The darkest darks and lightest lights come last. So create strong, sharp lines anywhere you see many details, such as around the eyes, toes, and nostrils. You might even want to add the whiskers. Add highlights with white pastels. Add some fun color with chalk pastels.
0 Comments
Your comment will be posted after it is approved.
Leave a Reply. |
AuthorJamie Lightfoot is an oil painter and owner of Picket Fence Art Studio. Archives
June 2024
Categories
All
|


 RSS Feed